


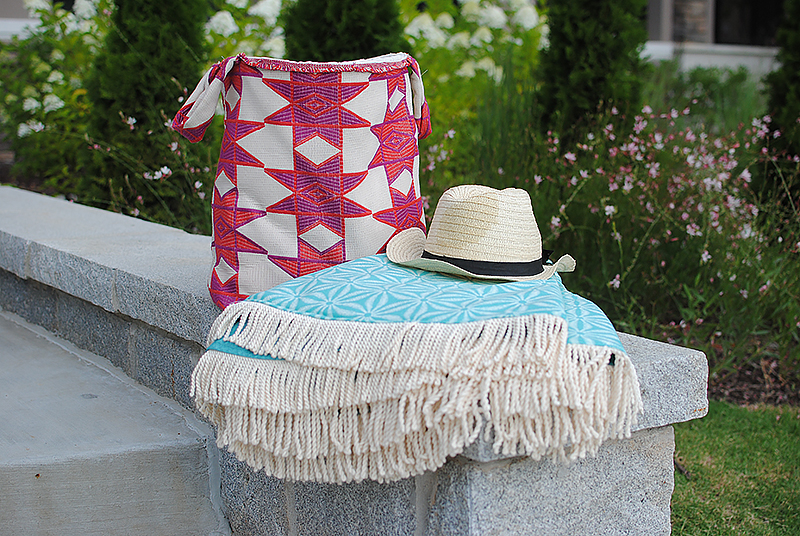
With Summer upon us and plenty of outdoor activities to enjoy. I found it useful to create an outdoor mat that is simple to carry around and clean up as well. The key is using an outdoor material for the top and bottom layer. Add some batting in between for some additional padding and you will be packing a picnic or heading to the beach in no time. Get the DIY tutorial below on how to sew an Outdoor Round Beach Mat.
Give this a try for your next outdoor adventure.
Supplies:
- 1 ½ yards of 54” wide Outdoor Fabric for top
- 1 ½ yards of 54” wide Outdoor Fabric for bottom
- 5 yards of bullion fringe
- 1 ½” of 54” wide batting
- Brother SE1900
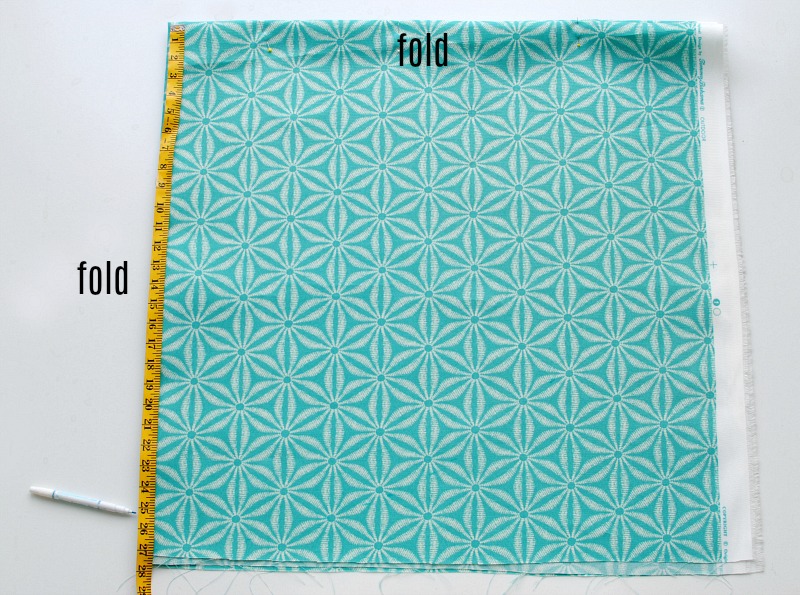
Cutting: Cut 54” of the fabric (both top and bottom) creating a square (54” x
54”). Fold in half down the center to create a (54” x 27”) rectangle Then fold in half again to create a (27” x 27”) square.
54”). Fold in half down the center to create a (54” x 27”) rectangle Then fold in half again to create a (27” x 27”) square.
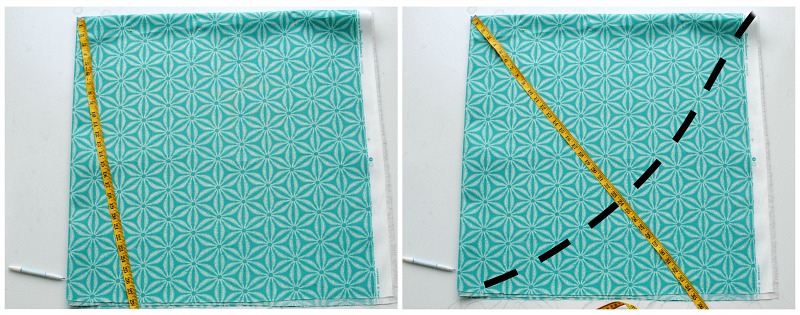
Use measuring tape and measure out 26” from the top corner and mark. Using that same top corner continue to go out a couple inches and mark the 26” until you get to the other end of the fabric.
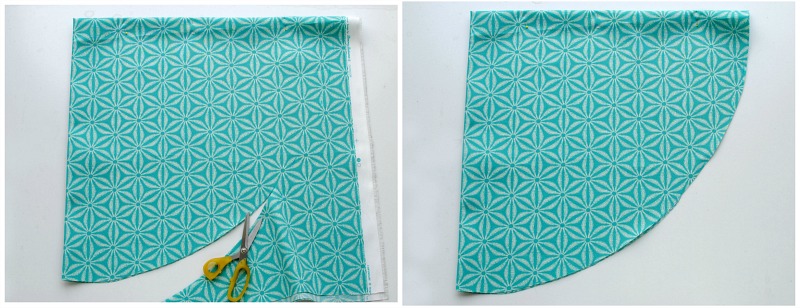
Cut along the markings. It should create a circle. Repeat for the liner and batting layer in between.
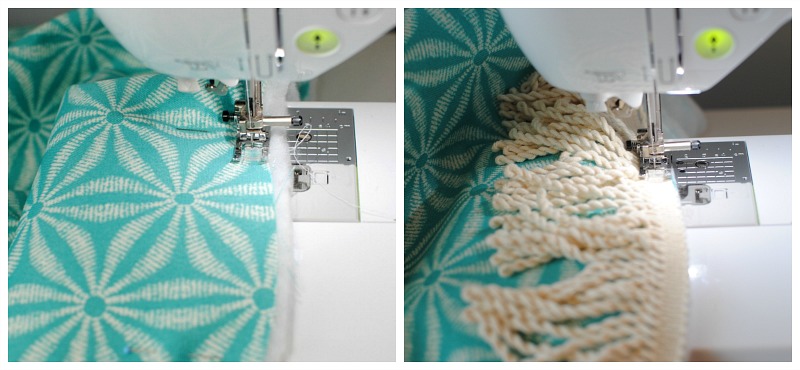
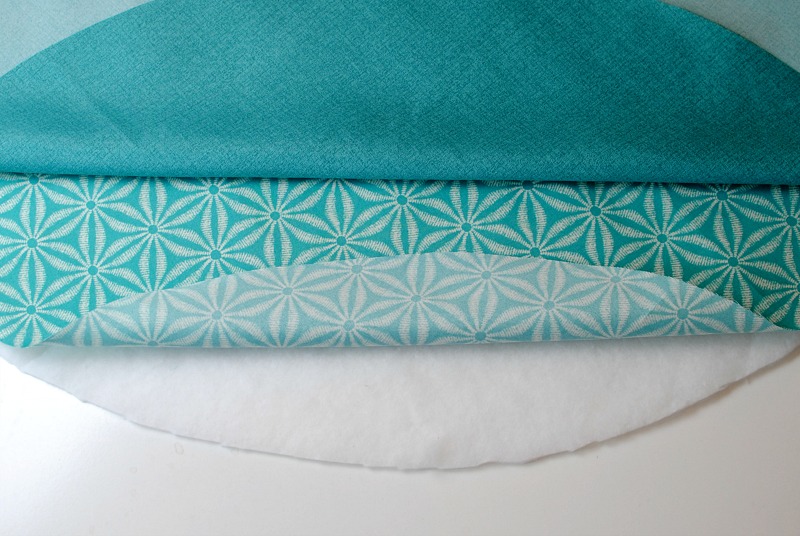
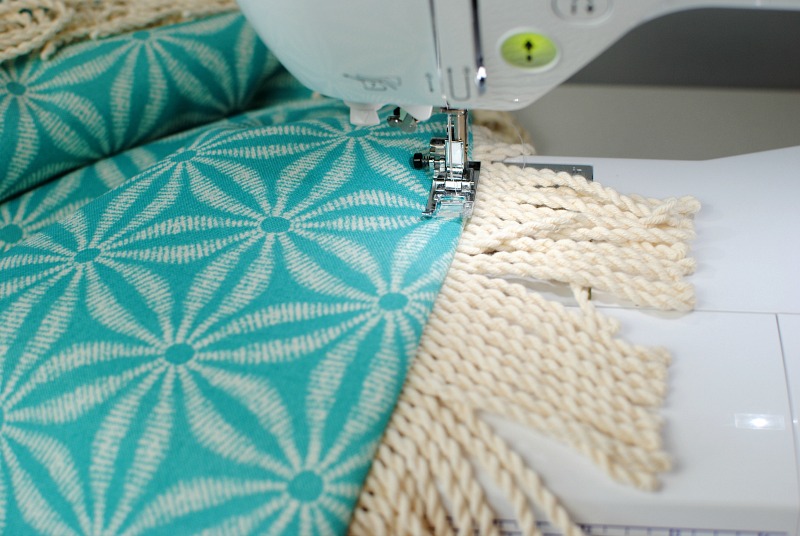
Sewing: Place top material and batting together making sure they’re even and pin. Sew top material and batting together (wrong side fabric facing batting) to combine the two pieces (¼” seam allowance). Baste stitch the fringe trim along the edge of the main top piece. (right sides together, ¼” seam allowance).
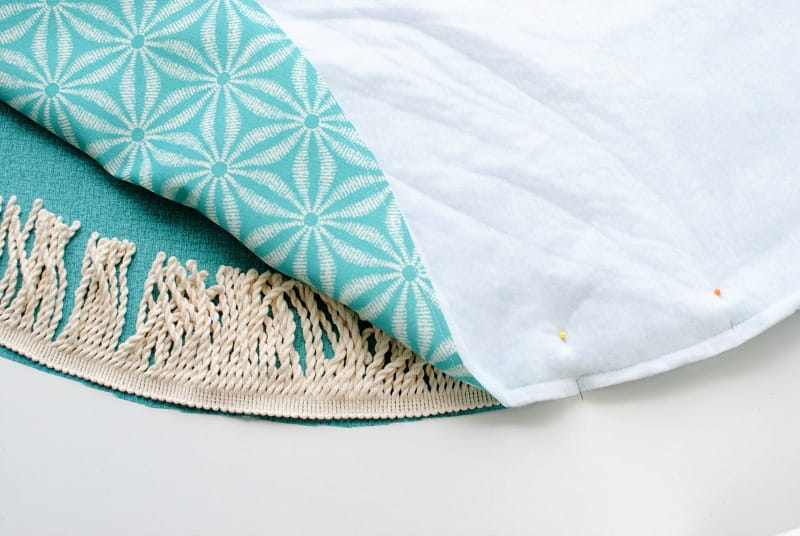
Place front and back right sides together. You will need to lay out the pieces and make sure they’re flat and pin all around the edge.
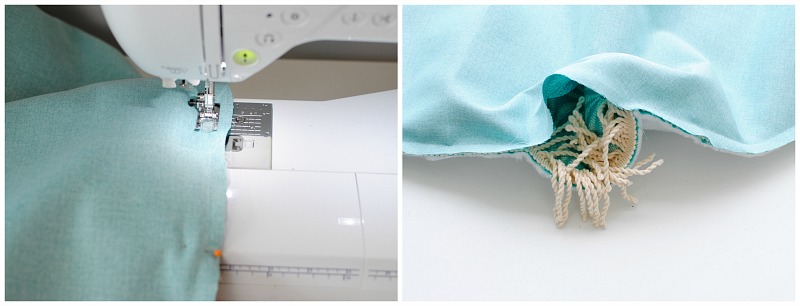
Sew right sides together (1/2” seam allowance) leaving a 6” opening to pull right side out. Press around edges and opening.
Top stitch all around the edge and secure the opening.

No comments:
Post a Comment
Note: Only a member of this blog may post a comment.